Friday, September 30, 2011

Super Easy Orzo and Chicken with Dill, Lemon, and Feta

After the cake debacle the other day, I decided to stick with easy for supper yesterday.  A few years ago, I made the original recipe from Martha Stewart (you can find that here), but I made a HUGE batch of it.  Yesterday, I halved the original recipe since I was just feeding my little nuclear family.  That’s what’s great about this recipe; it’s just so easy to half it again and make enough for just one person, and it doesn’t take much more effort to make enough to feed 20 people. 
I also love that it would be fine to just leave the chicken out if you wanted to, and it would still be just as good.  However, the Hubster has to have meat with every meal or he starts getting cranky.  You could also add extra veggies to it if you wanted.  Artichoke hearts would be perfect, and I was actually planning on adding some to the mix, but I couldn’t get our giant jar from Costco open, so I had to forgo those yesterday, but it still turned out just great!
 Start with a half of a pound of dry orzo pasta.  I guess that any really small pasta would work, but I just really love orzo.

 Add a cup of crumbled feta.  For those of you who don't use much feta, you can buy it already crumbled up (for the same price as the kind in the block), so that's a step that you can avoid.  Also, if you don't think that you like feta, just give it a try.  It tastes a little different cooked into a dish like this.  My mom swears that she hates feta, but she likes this dish.  However, if you are adamant, I guess you could just leave it out.

 When I halved the recipe, it called for one eighth of a cup of chopped fresh dill, but I think that it could have used a little more.  Actually, if could have used a lot more. Like maybe I should have doubled it. 

 Then, get a beautiful lemon!

 Once again, when halved the recipe called for a teaspoon of lemon zest, but that wasn't enough for me.  I added a little extra anyway, and it still could have used more.  Just use your judgment. 

 Then squeeze in some lemon juice.  About a tablespoon, but more if you really like lemon.

 Then, get out your fanciest cutting board to cut the chicken on.  I kid!  I like to use this little plasitc plate to cut chicken on because a) it's plastic, b) it's small enough that it doesn't take up too much room in the dish washer, and c) it has curved edges, so the chicken goo doesn't go all over the place. 

Anyway, cube up two chicken breasts.  Martha's recipe said to cut it in one inch cubes, but I really like my chicken much smaller than that.  However, that's up to you.

 Add the chopped chicken to the baking dish.

Put two cups of low sodium chicken broth in a microwave save bowl. 

Add a tablespoon of butter.

 Microwave the broth and butter until it is super hot.  Mine took 3 minutes on high. 

 Then, if you forgot to add the salt and pepper earlier, go ahead and do it now.  Of course I ran out of salt when I was making that cursed cake, so I didn't have any to add, and it was perfectly fine without it.

 Immediately pour the hot broth into the baking dish.

 And give it a quick stir.

 Until it looks like this. Then put it in a preheated 400 degree oven. 

 Bake for 40 minutes. 

 Then cover with some Parmesan cheese, and get some out of the middle for a taste test. 

Then fill in the whole with Parmesan, cover with lemons, and hope that no one will notice.

SERVE IMMEDIATELY!  For some reason, I thought that it would be okay to cook it in the morning, and then zap our plates in the microwave when we were ready to eat.  That definitely didn't work out.  It was dry before we even reheated it.  If this does happen to you, do like I did.  I crumbled it all up and put it in a pot on the stove with about two cups of chicken broth, and reheated it that way.  It was still delicious (after adding all of that extra liquid, it was still great when the Bunny and I ate it for breakfast this morning), but it added extra steps that this lazy, sleepy cook just didn't want to have to do last night.  However, in the end, it was worth it.

Have a great weekend,
The Sleepy Cook

Wednesday, September 28, 2011

Red Velvet Parfaits & Why I shouldn’t get overly ambitious these days.

I’m really not a bad cook.  I promise.  After this, you may not believe me, but I assure you that I’m not.  I had been thinking about writing a blog about the kind of food I’ve been cooking lately: easy food… lazy food… whatever you want to call it.   Anyway, tomorrow is the Hubster’s birthday, and for months I have been planning on making him The Pioneer Woman's red velvet cake, since that’s his favorite kind.  I know that homemade red velvet cake doesn’t really go along with the “easy” thing, but it’s not really hard, and it was going to be a sheet cake, so as far as homemade cakes go, this was going to do the trick.
Well, it’s days like today that remind me why I don’t mind being such a lazy cook sometimes.  I guess that I needed today to get me back on track!
Start with a cup of buttermilk. 

Then add two whole eggs.

Then add one teaspoon of vanilla extract and a teaspoon of baking soda.
Now stir it up.  Go ahead and use your measuring spoon; I don’t care.
Then, if you forgot to add the vinegar (like I did), go ahead and add one and a half teaspoons now, and stir it up again.  It will get nice and frothy.
Next, in a small bowl, add the food coloring.
And if you accidentally only bought one fluid ounce of red food coloring (like I did), add some water to get it up to one and a half fluid ounces of liquid.  I would assume that you could use one and a half ounces of water (and no food coloring) if you are worried about the side effects, but I’m sure that I wouldn’t want to hear the response that I would get if I served a red-less red velvet cake. 
Then add one and a half teaspoons of cocoa powder to the food coloring.
And stir.  Be careful with the plastic knife…
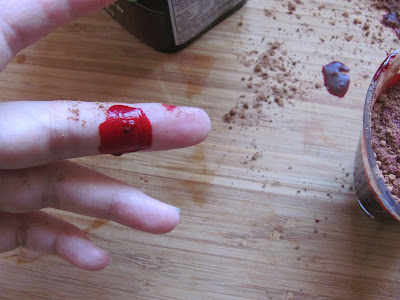
or you may cut yourself.  Okay, maybe it’s just where I splashed the food coloring all over the place, but it looks pretty gruesome, doesn’t it?
On that note, does anyone know how to get food coloring out of wood?  Or off of a window seal?  Don’t ask. 
Next, cream together a cup of shortening and one and three-fourths of a cup of sugar.
Then measure out two and a half cups of cake flour and pour it into the shortening-sugar mixture, and mix.  No I didn’t sift my flour.  Who actually does that? Anyone?
Then pour in half of the buttermilk mixture, and mix.
Then finish mixing in the flour.
And finish mixing in the wet mixture.
Then, if you forgot to mix the salt in with the flour, add it now.
Add the red mixture.
It will kind of look like a scene from Dexter.
Mix it until it’s all a beautiful scarlet hue. (Wow! That was cheesy!!)
Then spray the heck out of a sheet cake pan with some Pam, and pour the batter in.  Bake the cake in a preheated 350 degree oven for about 20 minutes.  (The original recipe said 20 minutes, but it took mine more like 25.)
While the cake it baking, make the icing.  Start with a cup of milk.
Pour it into a sauce pan, and add five tablespoons of flour to it.
Whisk the mixture until it gets thick.
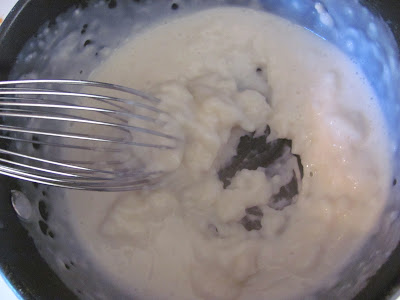
You won’t be expecting it, but it will get thick very quickly.  Trust me, one second it was liquid, and then the next second it looked like this.
Remove from heat and let it cool completely.
While that’s cooling, cream the heck out of a cup of butter and a cup of granulated sugar, then just leave it for a few minutes while the milk-flour mixture finished cooling.
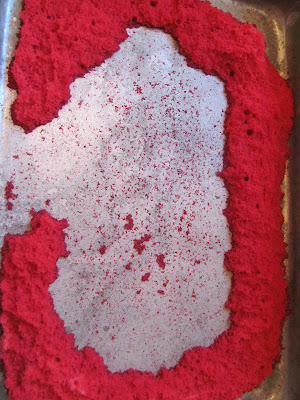
Remove the cake from the oven and let it cool for 20 minutes, then invert the cake pan onto a large cutting board.  DO NOT RUSH THIS STEP!  The Hubster was on his way home from work, so I gave the cake pan a whack on the cutting board.

And this happened.
Then, stir a teaspoon of vanilla into the cooled milk-flour mixture, and add that to the sugar-butter mixture.
And beat the H-E-DOUBLE HOCKEY STICKS out of it.  I mean, really give it a run for its money.   All of this icing beating gave me time to brainstorm about how I was going to salvage the Hubster’s birthday dessert.  Did I mention that at this point I was doing this all one handed, because I was holding the Bunny in my other arm?  Well I was, and somehow the Bunny or I (or the Bunny and I) knocked the bowl of icing off the counter.  Too bad I didn’t get a picture of the crime scene, because I’m sure that it would have been funny to an outsider.   There was icing all over the Bunny.  There was icing all over me.  There was icing all over the floor, the wall, the fridge, the oven.  There was icing all over everything, and the Bunny was eating it faster than I could clean it up.  Oh yeah, we lost over half of the icing in this fiasco.  However, if you don’t ruin most of your icing, go ahead and stick a spoon in for a taste test.  And then repeat.  Then maybe again. It’s just that good!
So how to fix this?  Waterford Crystal makes everything better, right?  Please tell me that it does!
Well, I did the rest one-handed, so there aren’t many more pictures, but crumble up some of the ruined cake and put it in the champagne flute (or your parfait vessel of choice), and alternate layers of crumbled cake and icing, finishing with icing on top.
Finish the parfait with a candle.  Of course, we didn’t have anything to light the candle with (it was just the kind of day where even that didn’t work out), but we have mini horses in our backyard, so that makes up for the flameless candle thing, right?  “What about the rest of the cake?” you ask.
Well, I chopped some of it up, and turned it into a disappointingly under-iced trifle. 
And the rest is still on the cutting board.  Free to a good home. 
If you can manage to get your cake out in one piece (literally), go ahead and ice it, and eat it the way cakes were made to be eaten.  That just wasn’t in the cards for us today.  This whole incident really took me down a notch, and I promise that it will only be easy recipes from now on.  Well, I can’t promise that, but it will be easy recipes for a little while, at least.
Oh yeah. If your child gets really quiet in the corner of the kitchen, make sure that he isn’t doing this:

to one of your favorite baking dished.
He does look remorseful, though, doesn’t he?
Better luck for us tomorrow, but for now, it’s time for bed.
-The Sleepy Cook