Monday, February 6, 2012

"Homemade" Chicken and Dumplings


My aunt Susan makes some mean chicken and dumplings, and I didn’t know that they weren’t homemade until I heard her joking one day about how long it took her to make all of her dumplings the exact same size and shape.  Some people, I’m sure, would have been upset by this revelation, but I was thrilled.  This meant that I could make delicious “homemade” chicken and dumplings at home without too much effort. 
 If you are offended by the use frozen dumplings, go ahead and stop reading now. If you are still reading, I promise that you won’t be disappointed.
First, put a whole chicken in a large pot,
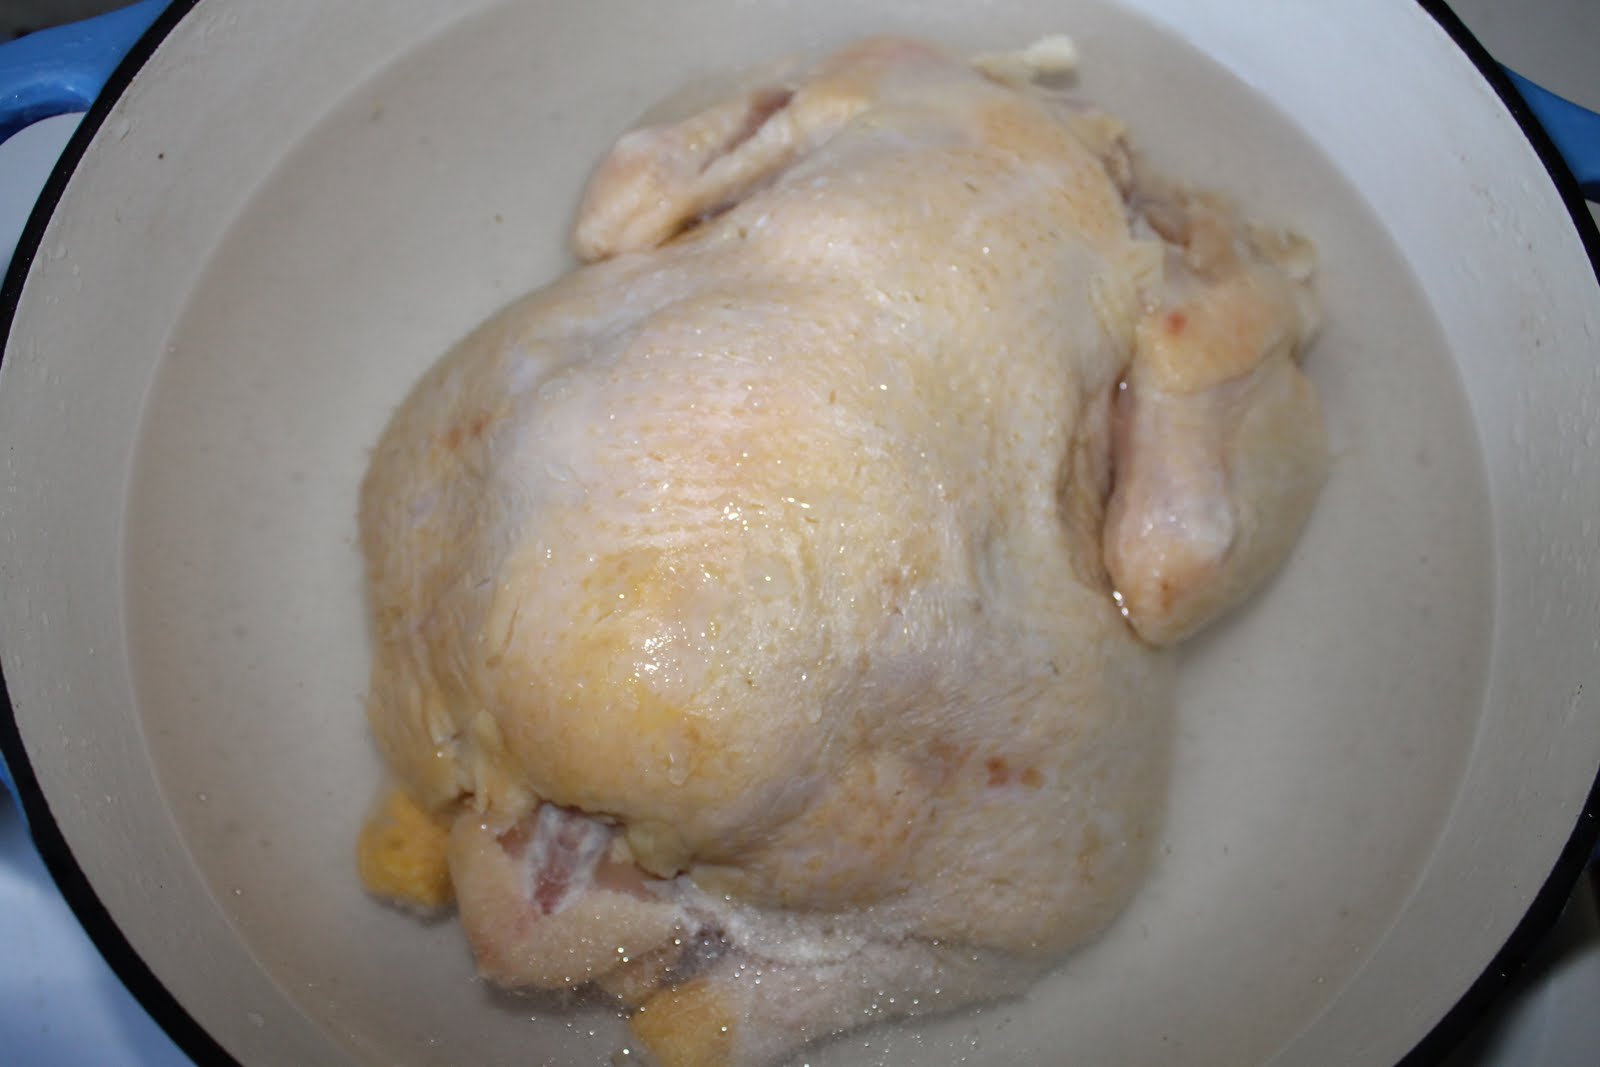
almost cover it with water,
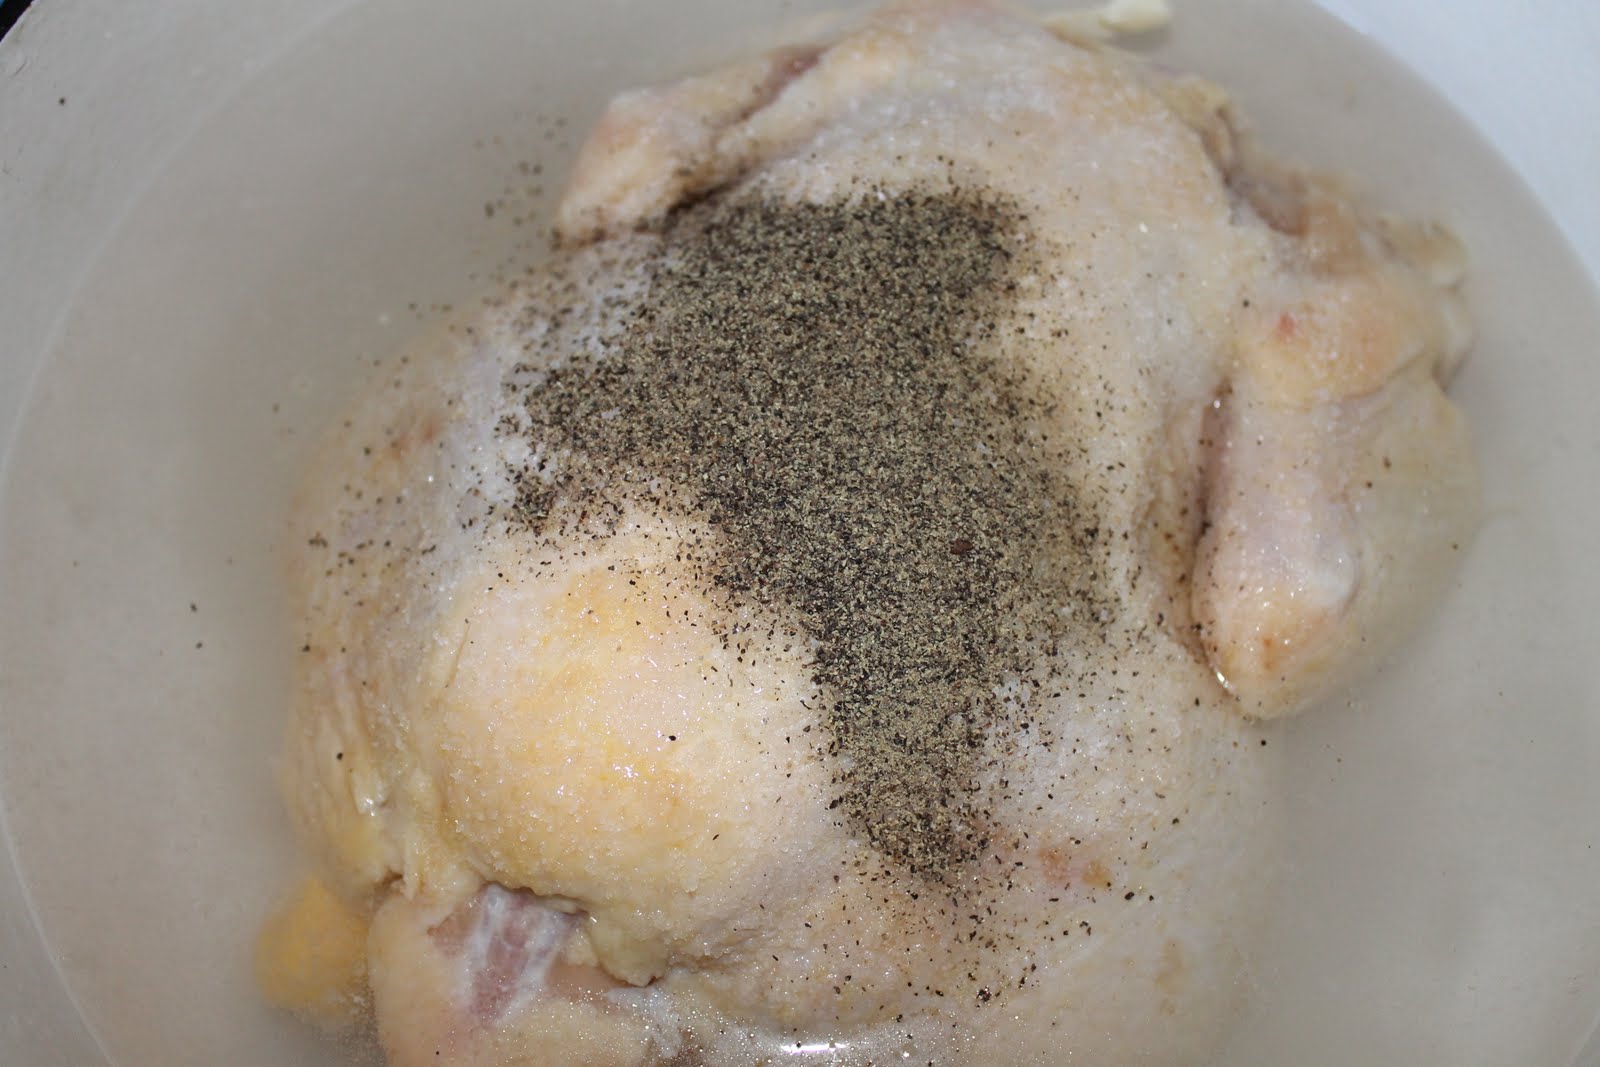
and add some salt and lots of pepper.
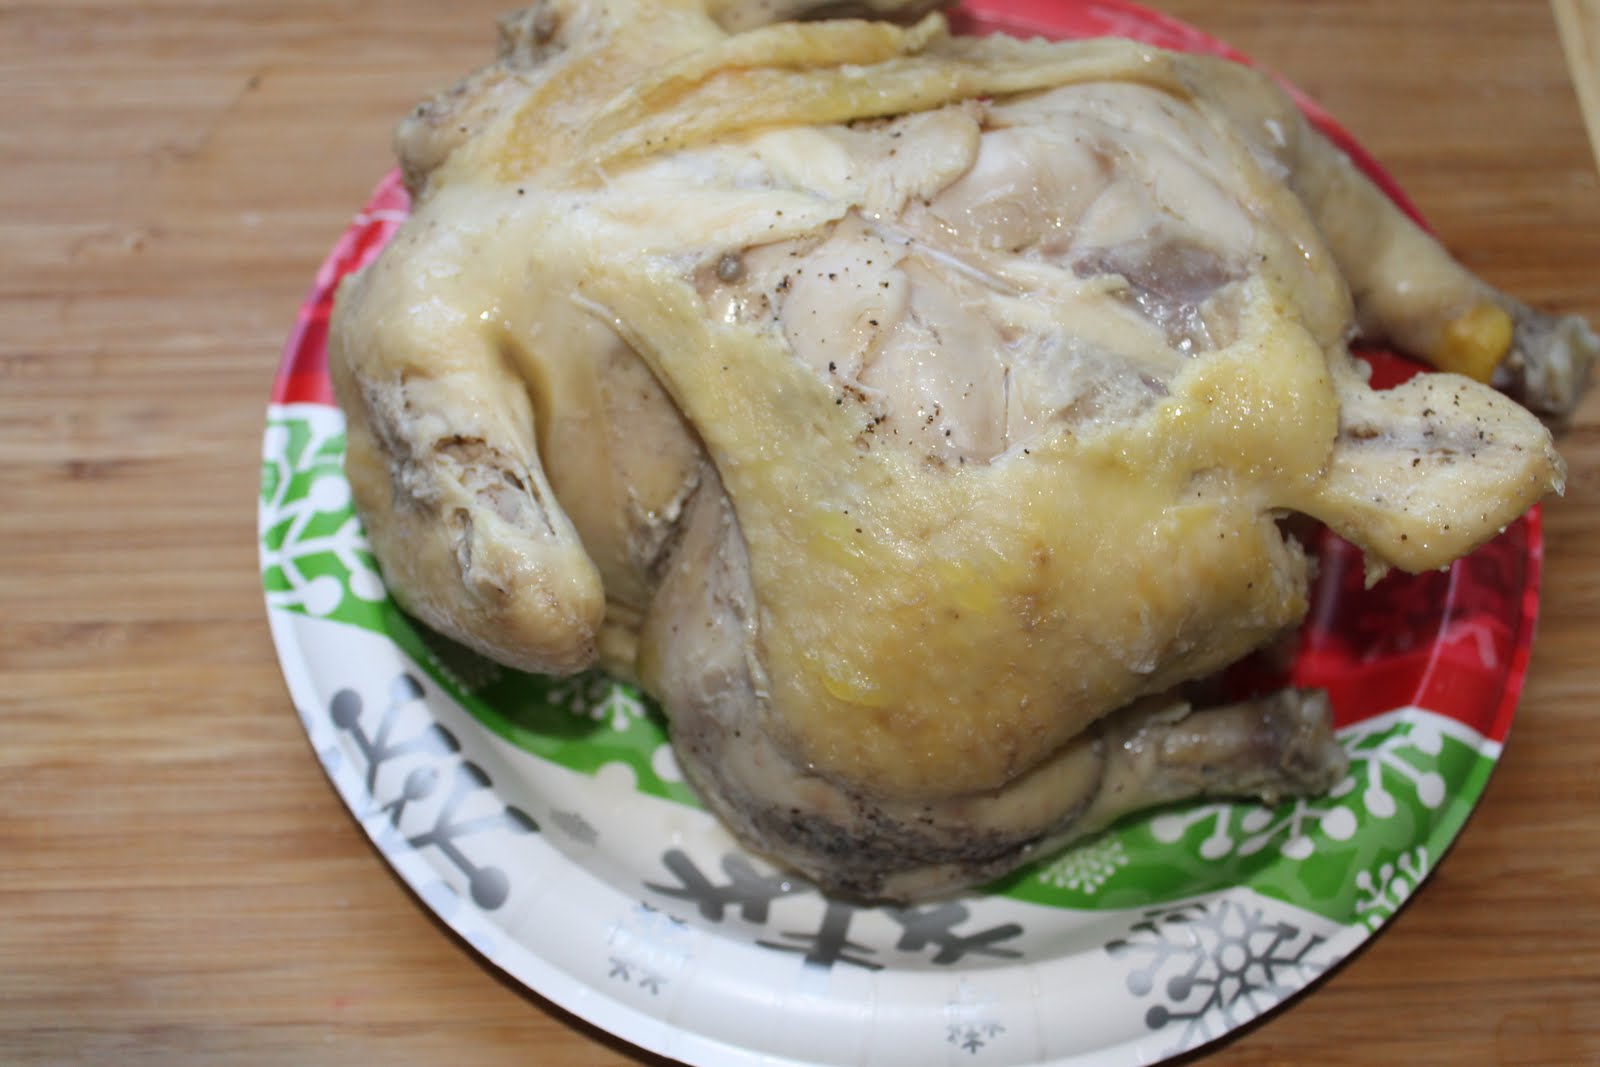
Let it simmer for about an hour, then set aside (preferably on a leftover Christmas paper plate… I kid!).
Add a box of chicken broth to the broth that you made by boiling the chicken.
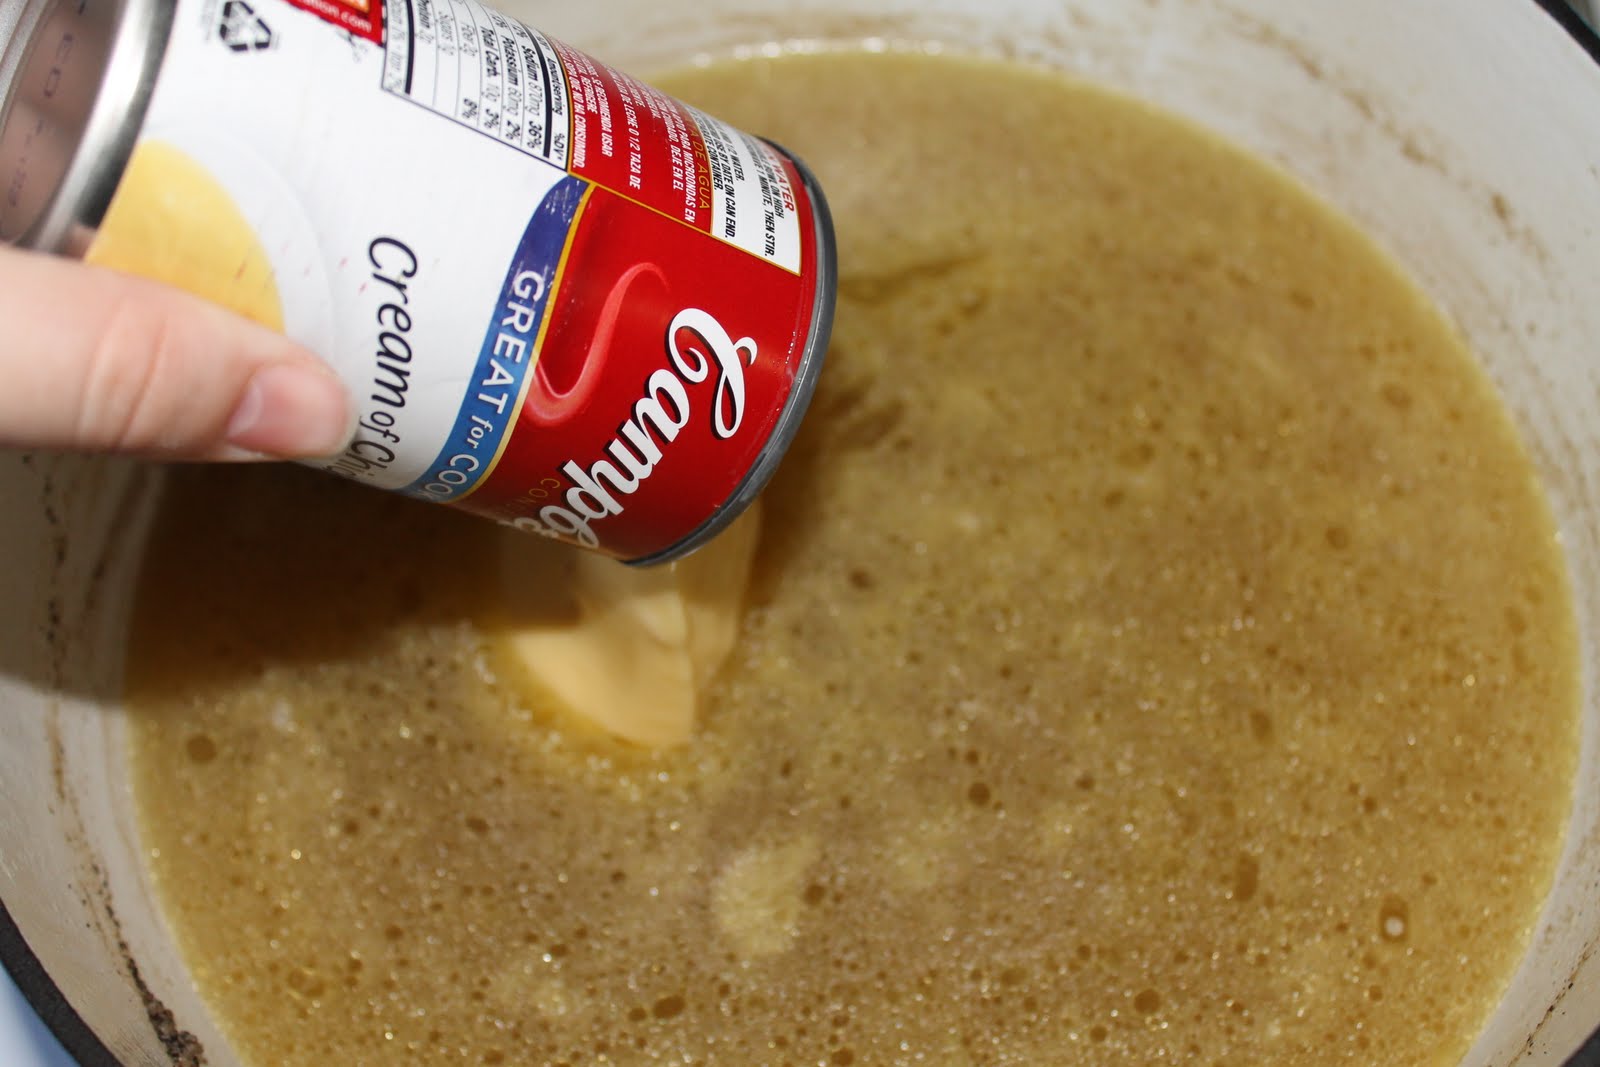
Add a can of cream of chicken soup if you like your dumplings thick and creamy.  If you like them soupier, leave it out.
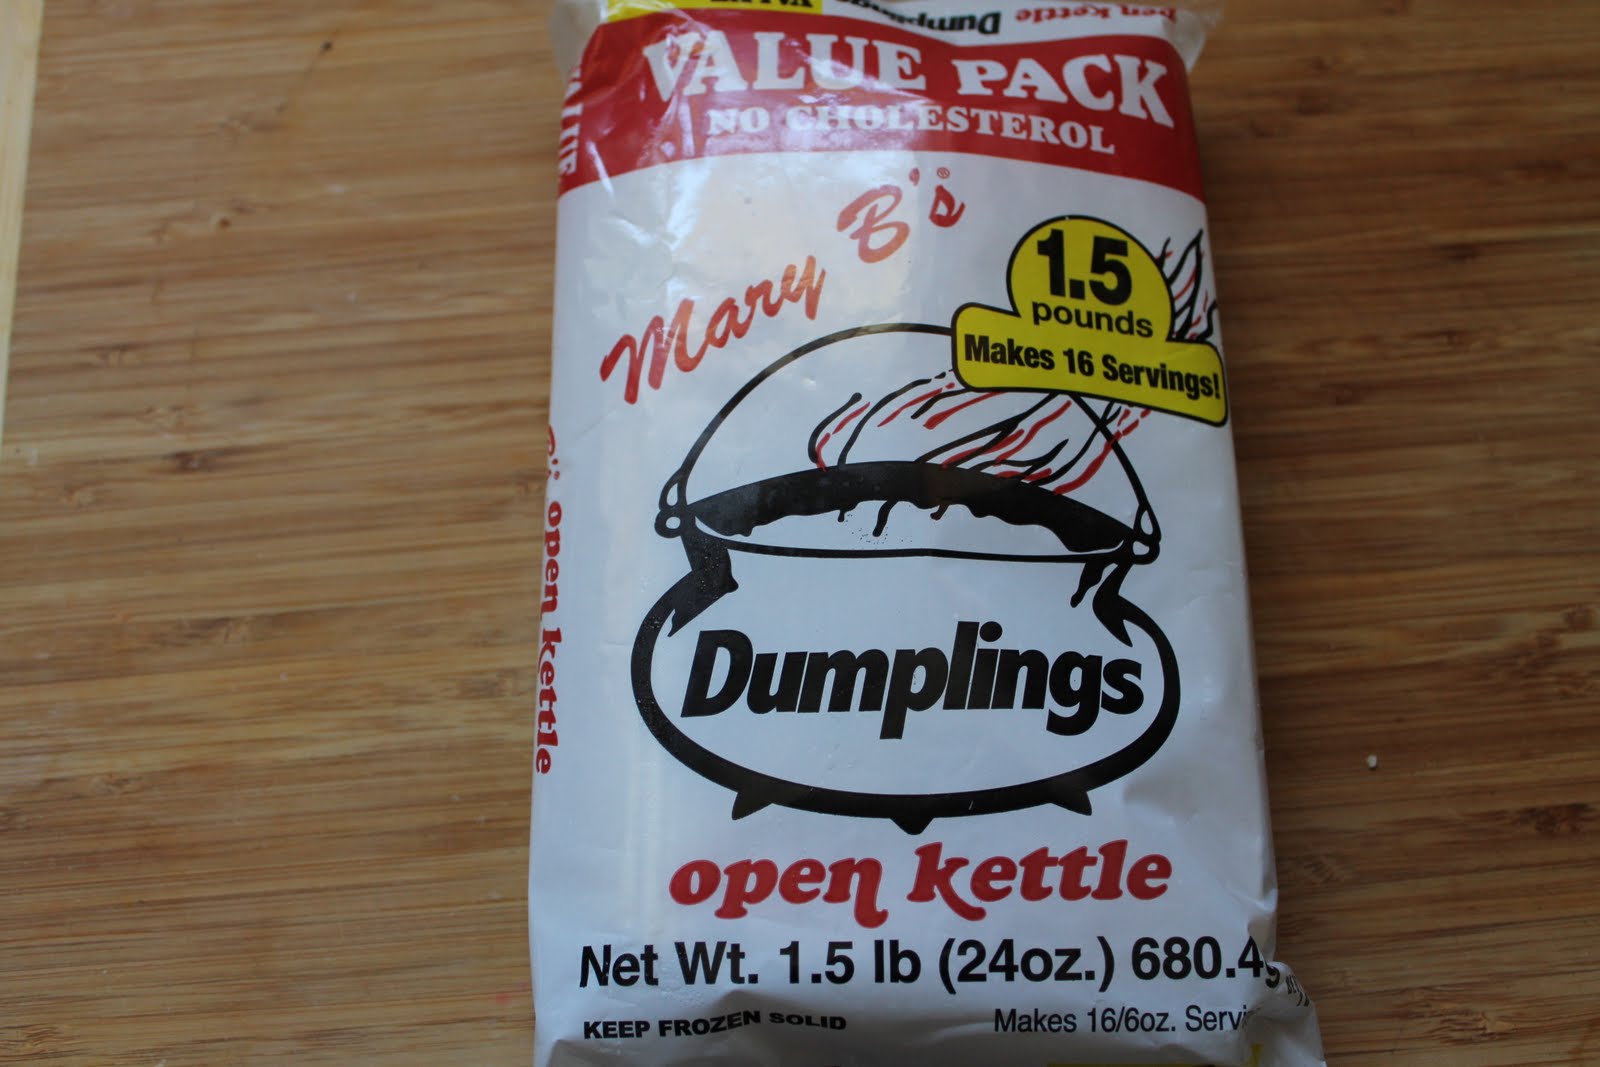
These are the dumplings that I like to use.  I have used other brands, too, and I’m sure that they are all just fine.  I know that the package says to keep the dumplings frozen, and just put them in the pot still frozen, but that’s not how I do it.  I either sit them out of the freezer and in the fridge the night before, or I sit them on the counter a few hours before I cook.  In a pinch, you can put them in the microwave a few seconds at a time.
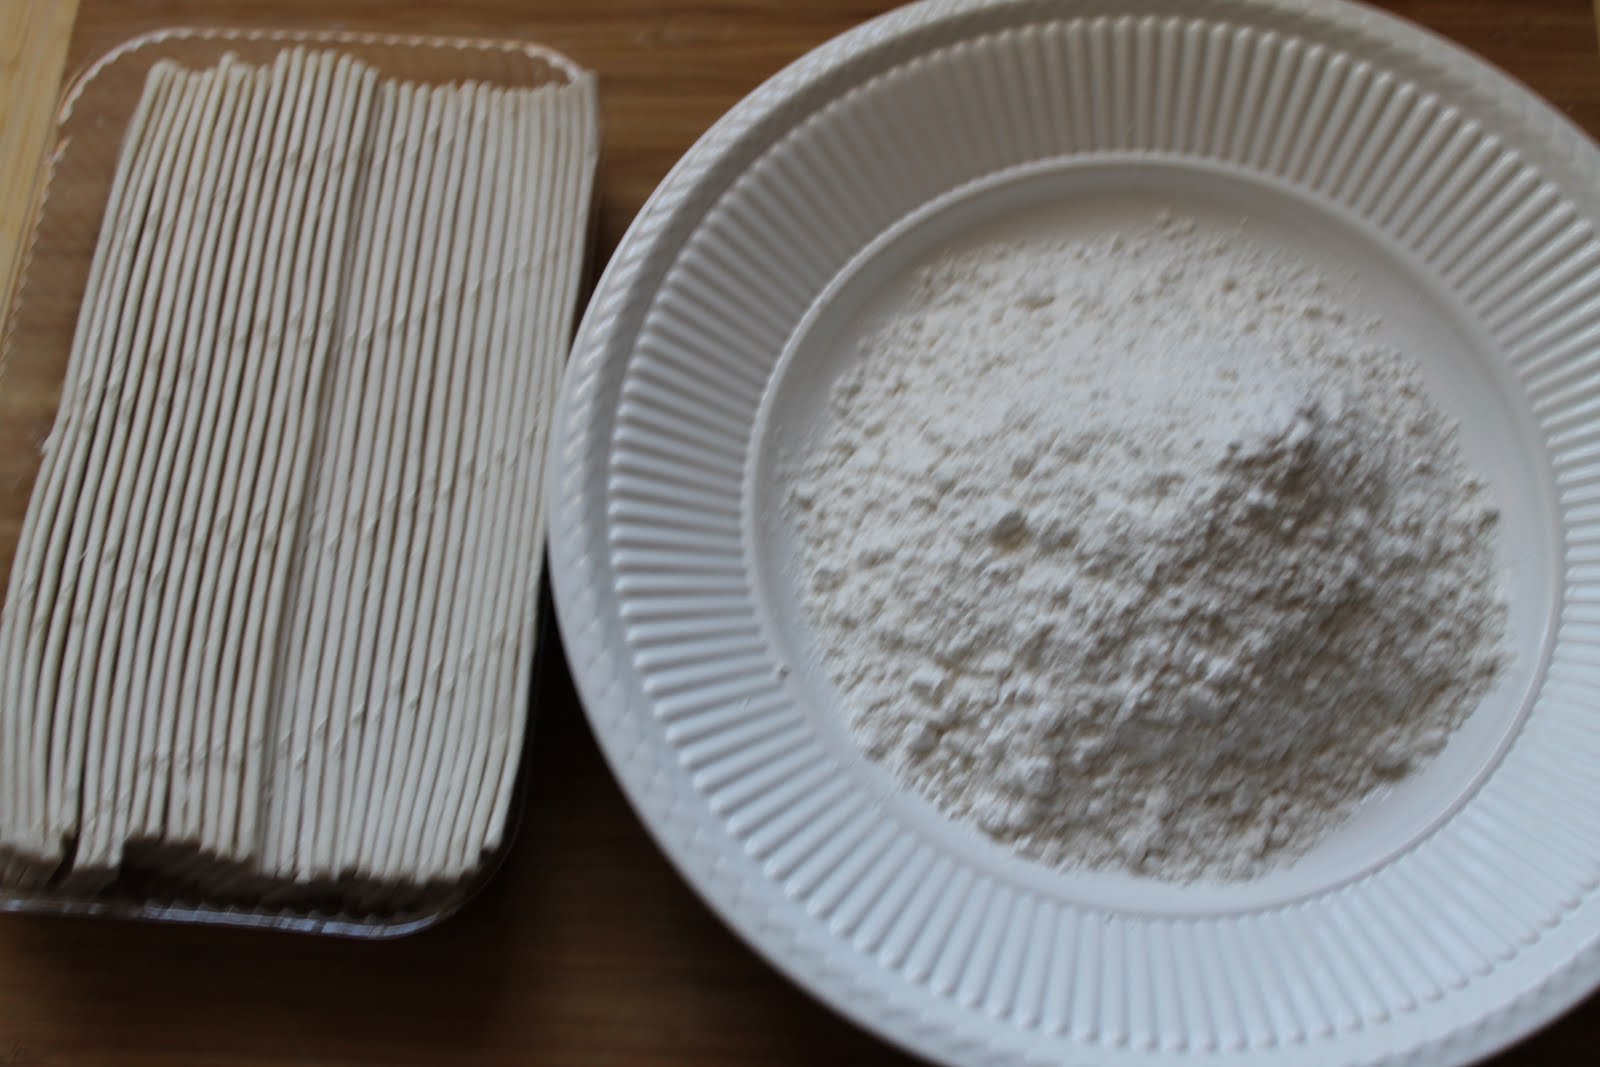
This is my work station.  It’s thawed out dumplings, and a plate of all-purpose flour.
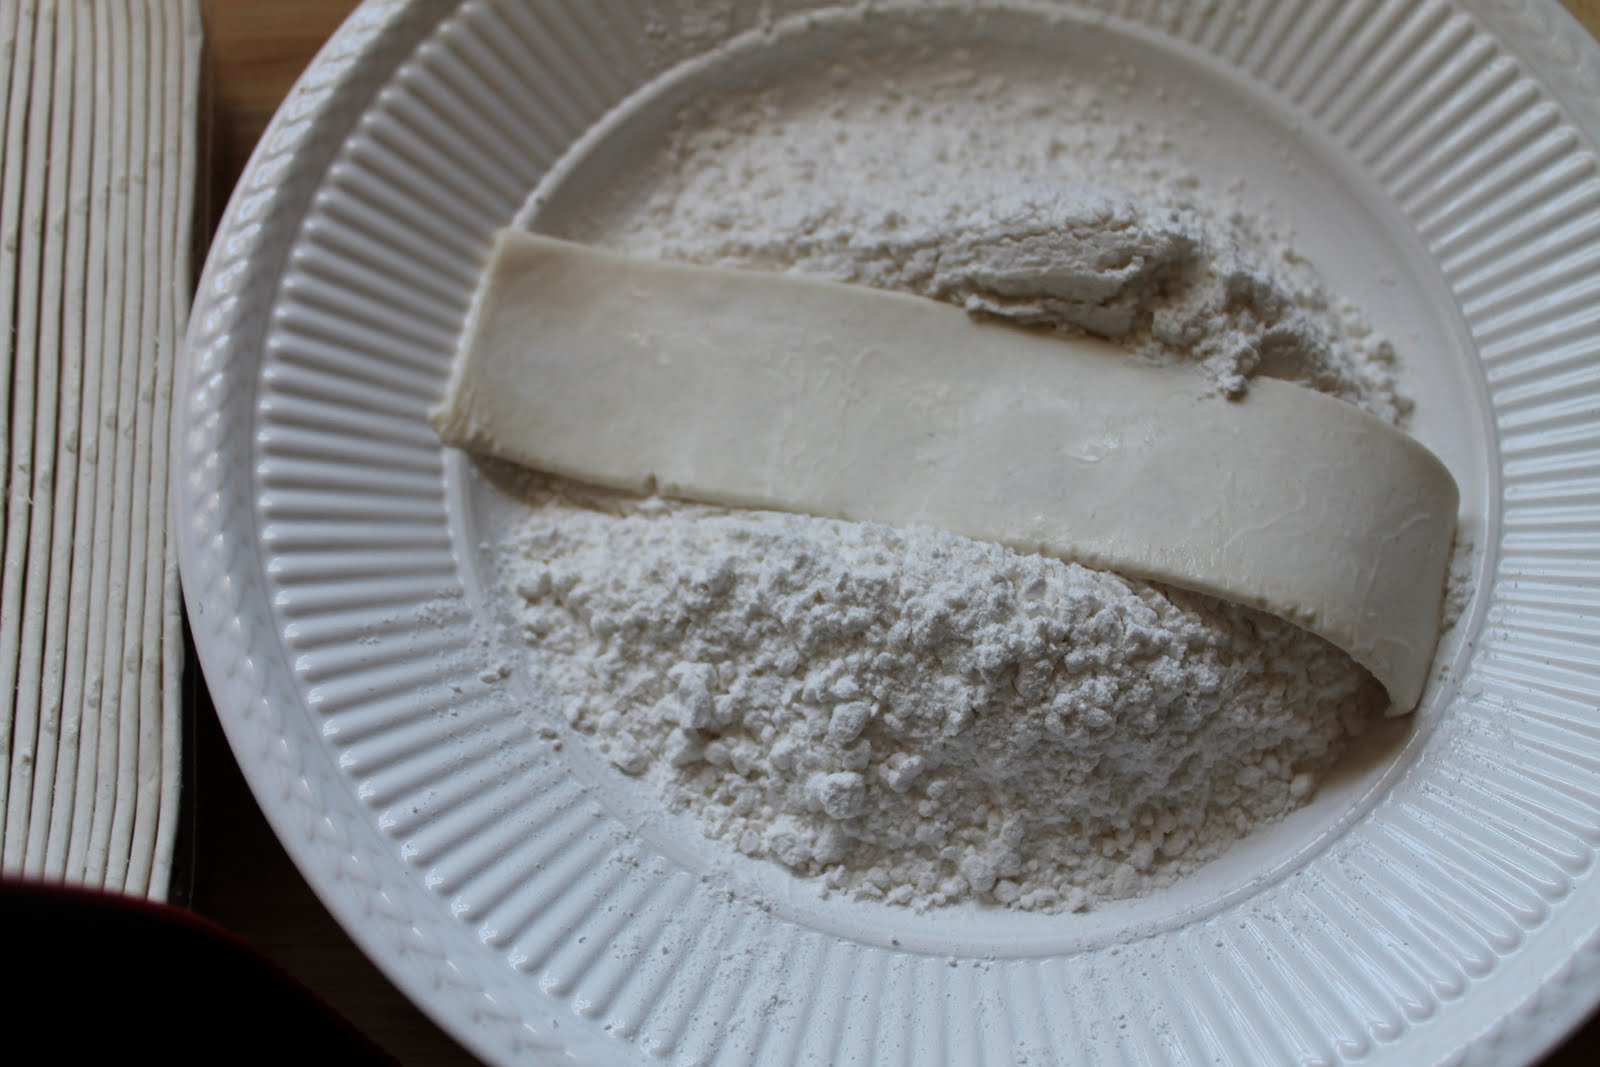
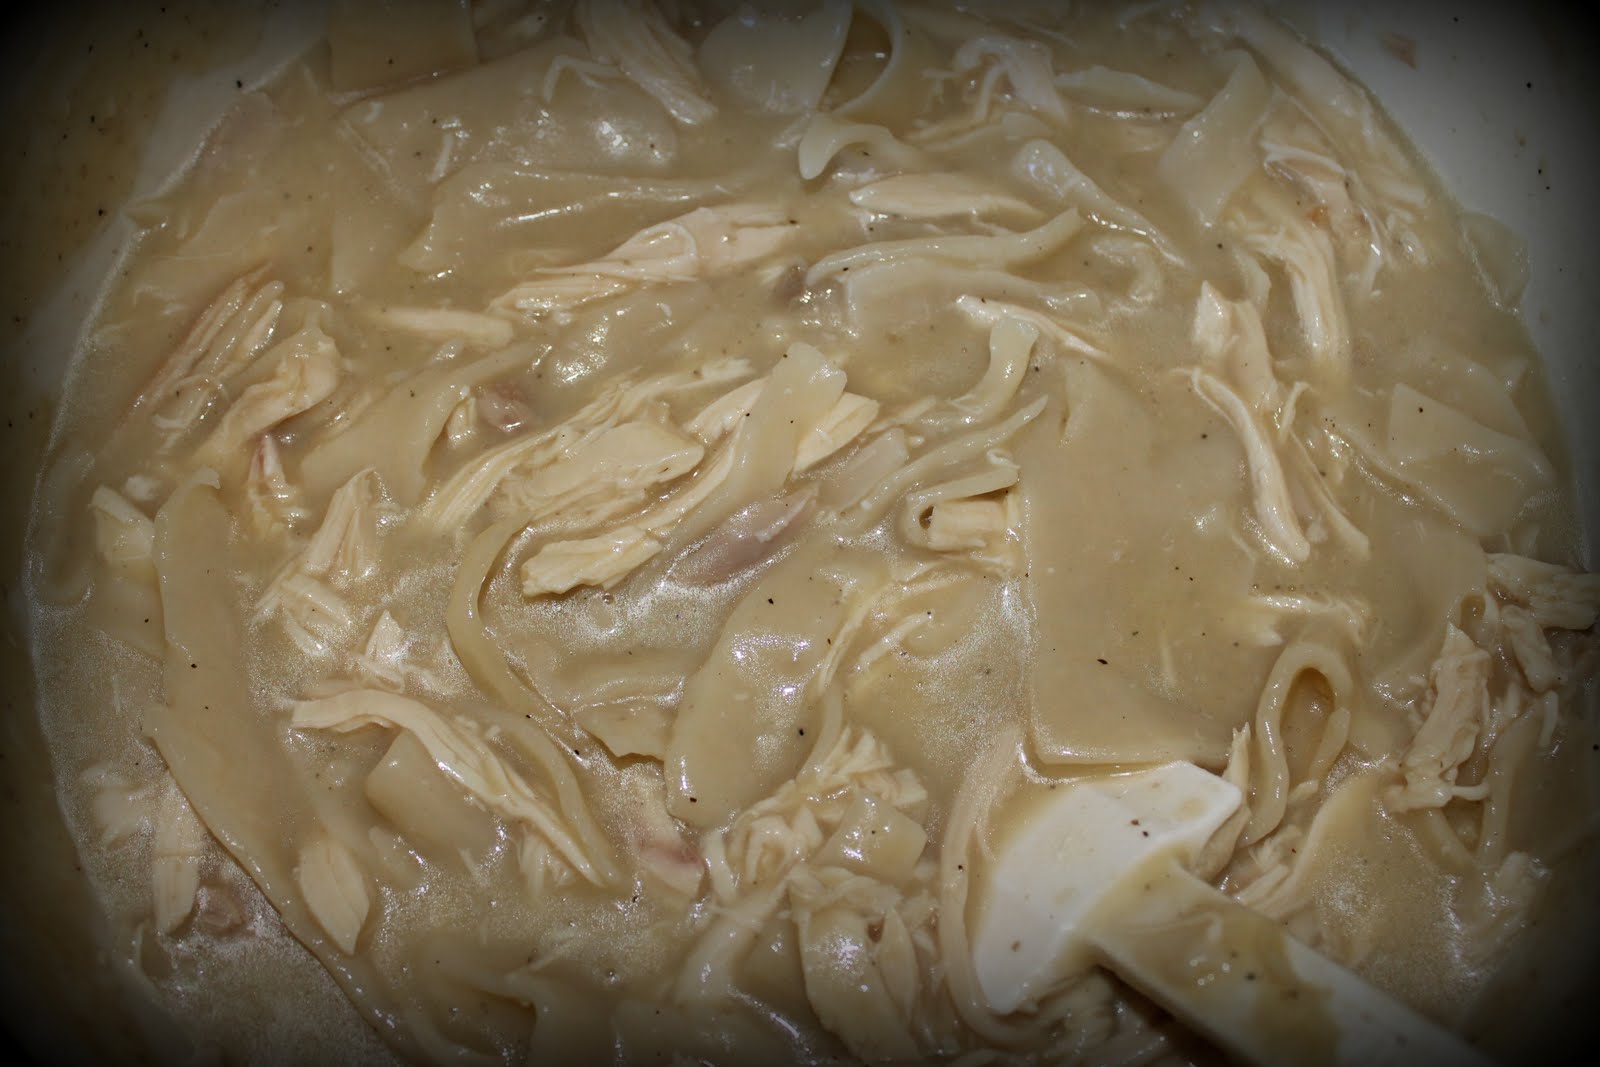
Take the dumplings, one at a time, plop them down in the flour, flip them over so the whole thing is covered, and put them in the pot of boiling broth.  Again, one at a time.  They will stick if you do it differently, and no one wants clumped up dumplings.
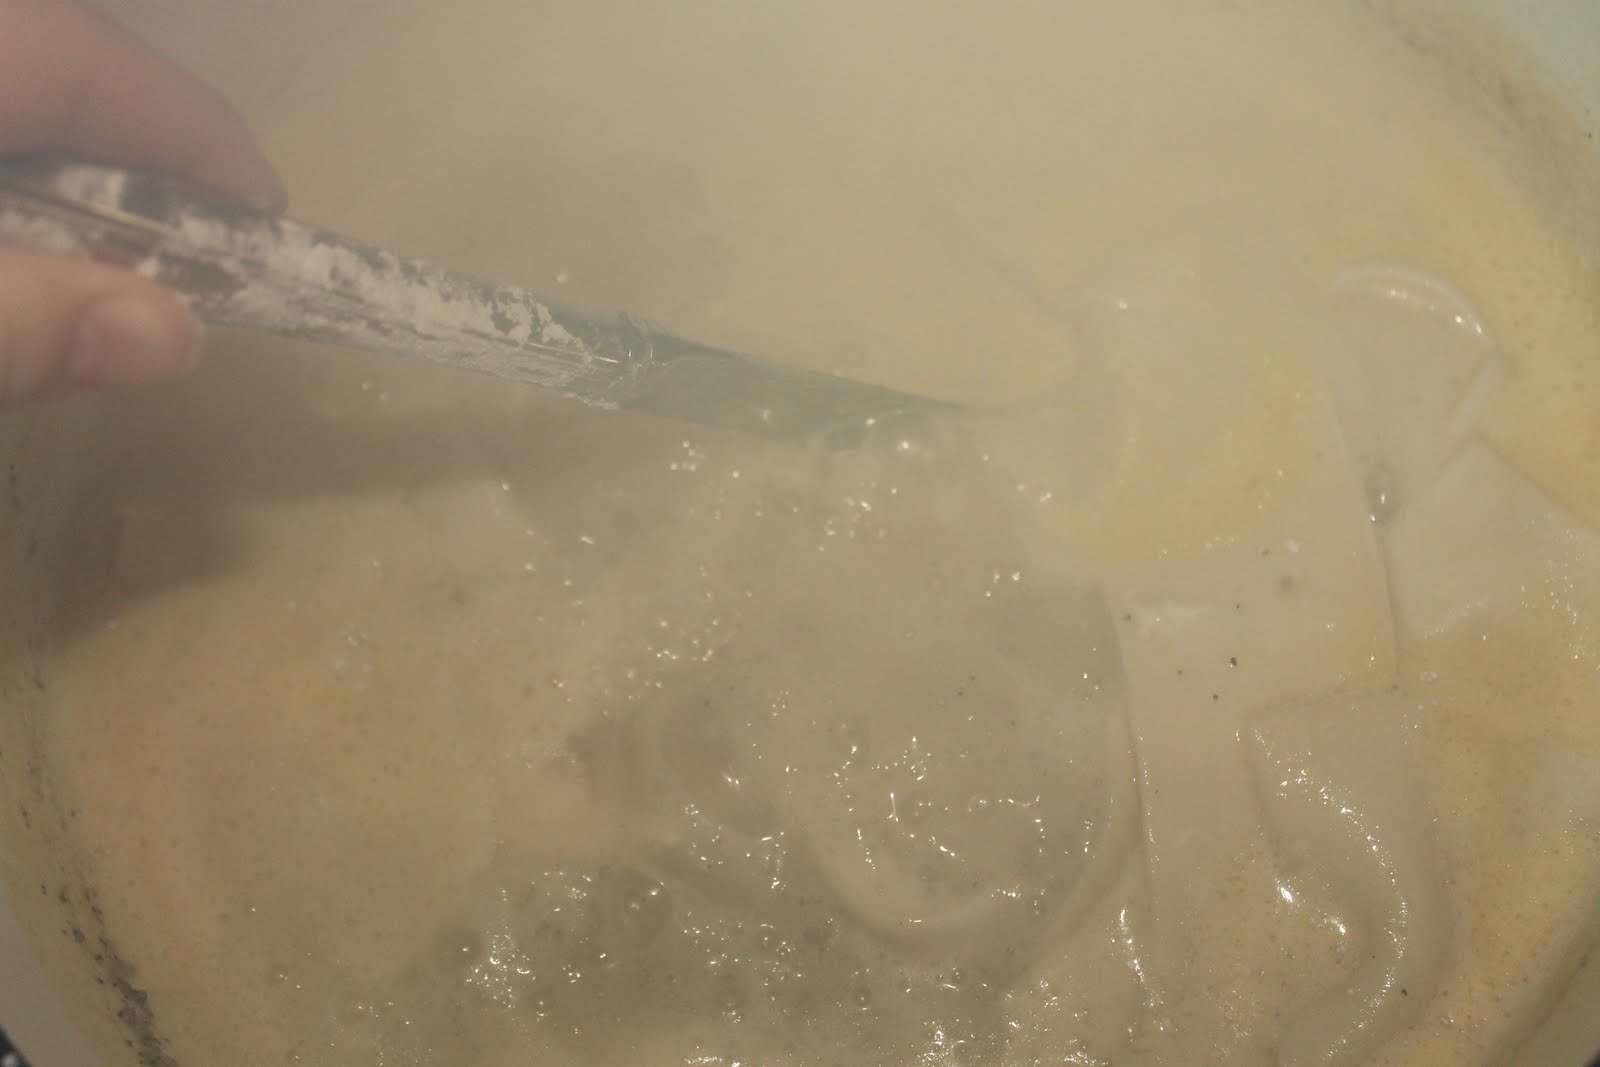
I’m sorry for the steamy picture, but I feel that this is a good time to tell you about the importance of stirring.  Stir, stir, stir.  Then stir some more.  If you don’t stir it enough, they will stick together.  I stir every three dumplings.  That means that I add three dumplings (still one at a time), then give it a big stir.  Then I add three more, and then stir again.  I do this until I’ve added all of the dumplings.  Once they are all added, let the pot boil for about 20 or 30 minutes, and stir at least every five minutes—more often if you’re feeling overly ambitious.
This is also a good time to talk about stirring utensils.  Some people choose to stir with a knife so the dumplings don’t break.  I tried it for a little while, but I was too worried about the effects of stirring with metal in my enameled Dutch oven, so I went back to using my trusty old spatula.  It is true that a knife won’t break the dumplings, but I was more concerned about scratched enamel than broken dumplings, but that’s a personal choice. Make it for yourself.
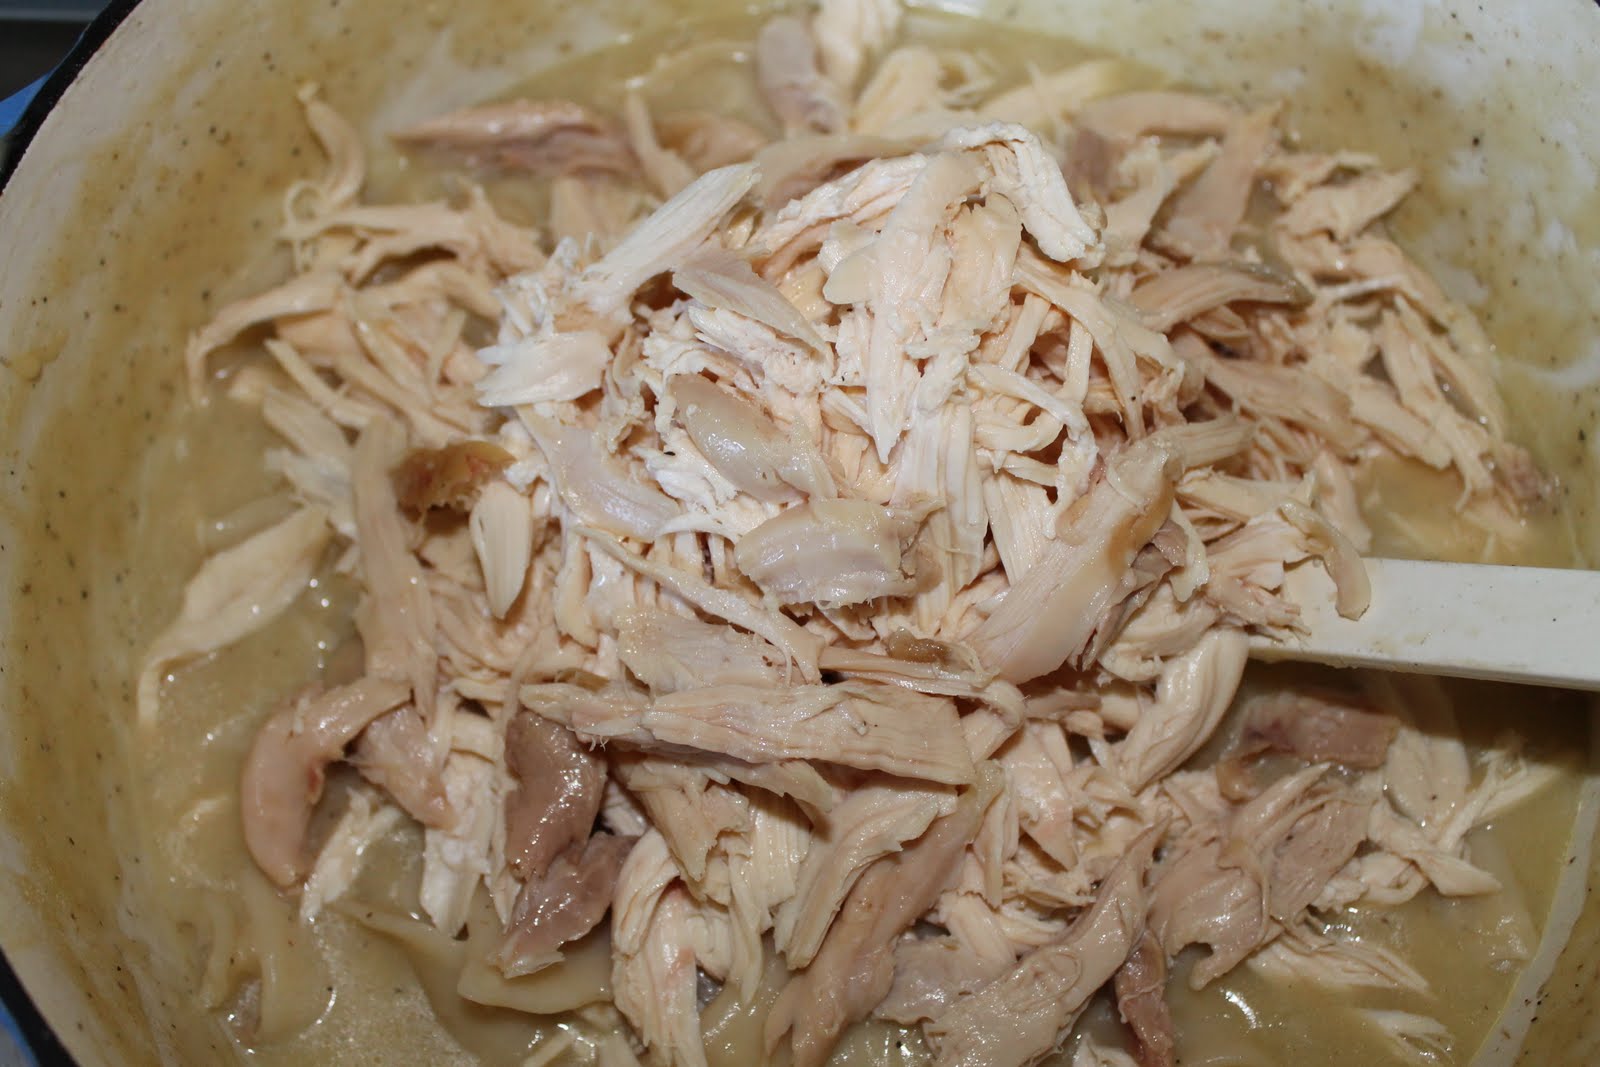
Once the dumplings are finished cooking, pull all the meat off of that chicken that you boiled and then forgot about, and add it to the pot.  Stir it in, serve it up, and devour.  
By the way, if you’re feeling extra sleepy, you can skip boiling the chicken and use a rotisserie chicken and two boxes of chicken broth.  It’s delicious, but it just feels more legit to me to boil the whole chicken.  Again, a personal choice.
I almost forgot to mention that Aunt Susan adds a whole stick of butter after adding in the meat.  I don’t, because I don’t want to feel that much guiltier, but Aunt Susan’s sure is good!

“Homemade” Chicken and Dumplings:
1 chicken (and water to cover)
2 tsp. salt
1 tbsp. plus 2 tsp. black pepper
1 box chicken broth
1 can cream of chicken soup
1 package frozen dumplings, thawed
1 ½ c. all-purpose flour
1 stick butter (optional)
Place chicken, salt, and pepper in a large pot and add enough water to almost cover the chicken. Simmer until done (approx. an hour).  Once done, remove chicken from pot and set aside.  Add broth and soup to pot and bring to a boil.  Dip dumplings in flour, and add to pot, one at a time, stirring often.  Boil dumplings for 25 minutes, stirring very often.  Pull meat from chicken, and add to pot. Add butter, and stir.

Wednesday, January 25, 2012

Honey BBQ Chicken

I made this the other night really quickly with the intentions of just cooking it, eating it, and not even worrying about taking pictures.  However, once it was done, it was just too good not to share.  It’s nothing fancy, and no big deal (you use bottled BBQ sauce), but using chicken thighs and browning the chicken really make all the difference. Start by salting and peppering some boneless skinless chicken thighs, and placing them in some hot olive oil in the bottom of a Dutch oven or other larger cooking vessel.  (You’re going to start them out like this recipe.)  Then, when it’s all brown and crispy, pour a bottle of sweet BBQ sauce and pop it in a preheated 350 degree oven for about 20 minutes.  Drizzle honey all over it, and that’s it—you have Honey BBQ chicken!

"Fancy" Chicken Salad

I don’t like chicken salad.  I never have.  Well, not until I discovered this stuff.  It’s a combination of a few people’s recipes and a few tweaks of my own.  It’s another one of these “add what you like, leave out what you don’t” type things, which is what I love!  Another thing that I love is that here is no mayo in this stuff—absolutely none.  Some people like a lot of mayo in their chicken salad, some people like just a little, but if I know that it’s in there (even if I can’t taste it), it really freaks me out, and I can’t eat it, so I have come up with an alternative.  
This stuff is perfect for any occasion.  I call it “fancy” because it looks fancy, but it doesn’t have to be made for a fancy tea party or bridal shower.  It’s also perfect just for lunch at work or a quick weeknight supper.  However you chose to enjoy, just trust me when I say that you will truly enjoy it. 

Start with two blocks of softened cream cheese.  I used the fat free kind because there is so much other stuff in the salad that I don’t notice, but if you need to know that there is full fat cream cheese in your chicken salad, do it if for no other reason than peace of mind.  Use  a mixer to beat the cream cheese.
Then, pour in about 1/3 cup olive oil and use the mixer to mix it all up.
Add a bag of Craisins (dried cranberries) and a small bag (or whatever amount you want) of pecan pieces.
Add a diced red bell pepper, a diced yellow bell pepper, a bunch of chopped green onions (the green parts and the white parts), 2 heaping tablespoons of minced garlic (the kind in the jar), and a teaspoon of lemon pepper seasoning.  I have since then realized that I actually like this chicken salad better without the lemon pepper, but I’ve never had complaints with it in there.
Add all the meat from a cooked chicken.  I like to use a lemon pepper rotisserie chicken because a) it’s super flavorful, and b) it’s easy, but you can boil or roast your own chicken if you want.
Mix it all up with your mixer, and you’re done.  Our favorite way to eat it is on mini croissants, but it’s equally as delicious on crackers, straight up on a fork, etc.

Tuesday, January 3, 2012

Dad's Crock Pot Apple Butter

I got a call from my dad a while ago.  He said that one of the nurses that he works with told him about making apple butter in the crock pot, and that I needed to come take pictures of him while he made it for my blog. (It’s nice to have supportive people in your life, isn’t it?) 
It was quite an ordeal.  Making the apple butter wasn’t an ordeal, but trying to get Dad to understand that he needed to stop for just a sec between steps so I could take a picture was the ordeal.  Dad is accustomed to delivering babies, doing surgery, and important things like that.  He’s a “get it done” type, who doesn’t fiddle-fart around like I tend to do.  Needless to say, we are missing pictures of a few steps, but it’s so simple that I’m pretty sure that you can catch on.  I have faith in you, loyal reader. 

Let me go ahead and say here that you need 4 ingredients to make this stuff.  You need equal parts (by volume) of chopped apples and sugar.  That means that if you have 6 cups of chopped apples, you need six cups of sugar.  You will also need cinnamon (that was Dad’s creative addition to the original recipe) and nonstick cooking spray. 

Start by peeling, slicing, and coring some apples.  You will need to chop them up smaller than the apples pictured above, but of course we’re missing a picture of that step.
Next, spray every inch of the Crock Pot with nonstick spray.
Pour half of the chopped apples into the bottom of the Crock Pot.
Pour half of the sugar on top of the apples, then sprinkle with ground cinnamon.
Then, pour the rest of the apples, the rest of the sugar, and some more cinnamon on top.  Cover, and let it cook on low overnight/all  day/until it’s done.
It will look like this when it’s done.
Dad said that it was too chunky for his taste when it was finished, so he took care of the problem before I even got over to my parents’ house with my camera.  I told you that he is a “get it done” type.  An emersion blender would be perfect for that, but of course we can never find the emersion blender when it’s needed.  Does anyone else have that problem?  Anyway, Dad used the hand mixer to mix it up, but I’m sure that you could also use a potato masher or even a large spoon and some serious elbow grease. 
We just put ours in jars for storage, and because it makes it look very legit, but we didn’t actually seal the jars.  If you want to, I’m sure that you can Google “canning,” but there is so much sugar in this stuff, that I think that it will last for quite a while in the fridge.

Monday, December 19, 2011

Souper Easy Spicy-ish Tomato Soup

I really just love this soup.  I’m not really sure where I got the original recipe, but it was a few years ago, and I feel like I’ve made enough changes to it that I can consider this my own.
It’s just the perfect soup.  It’s easy.  It’s delicious.  You can add whatever veggies you want, and you can make it as spicy (or not spicy) as you want.  It’s great paired with a grilled cheese or salad, but it’s also hearty enough on its own.  Trust me when I say that it’s perfect.
Start by peeling and chopping about three carrots.  I usually use baby carrots so I don’t have to peel them, but I had big carrots, so that’s what I used.  I guess that you could even use those shredded carrots that come in a bag if you’re feeling extra lazy.
Also, if you don’t like carrots, leave them out.  If you only like them a little bit, just add a few.  If you really love carrots, add some extra.  This part is totally up to you. 
Put some olive oil in a big pot and get it really hot.  Then put the carrots in the hot oil.  You want the carrots to start getting soft, which takes a while, and which leaves you plenty of time to…
slice up some onion!  If you really like onion, slice up a whole one (like I did).  If you don’t, then put less or leave it out.  Again, it’s up to you. 
Put the onions and some minced garlic in the pot.  I chopped up some marinated artichoke hearts, and added them too, because I bought a HUGE jar of them at Costco, and I needed to use them.  Leave them out if you don’t like them or don’t have them.  Add some other veggie if you want. 
Once all of the veggies are cooked, add a jar of marinara sauce (you know, the kind you use to make spaghetti).
Then, add a box of chicken stock.
Drain and rinse a can of cannelloni beans, and add them to the pot.  Oh yeah, white kidney beans are the same as cannelloni beans.  At least I think that they are.
Toss in a handful of some kind of teeny tiny pasta, and let it cook for at least 5 minutes or so. 
Once it has cooked, add some red pepper flakes.  Add as much as you want.  I just added enough to make it spicyish, as I’m a total wimp, but the Hubster added extra to the bowl that he and the Bunny shared. 
I didn’t get a picture of the soup in a pretty bowl or anything, because, well, I was extra sleepy, and had to hurry to get ready for work, but this soup is just too good not to share, even if I don’t have a fancy picture of it.

Saturday, December 3, 2011

Oreo Treats (or whatever you want to call them)

I’ve made another great find on Pinteret.  They’re Oreo Rice Crispy Treats. Or Oreo Crispy Treats. Or just Oreo Treats.  Anyway, whatever you call them, they are just like Rice Crispy Treats, but made with crushed up Oreos instead of Rice Crispy cereal.  They are just as good, and just as easy to make, but just something a little different.  All that you need to make these is a pack of Oreos, 5 cups of mini marshmallows, and half a stick of butter.  Oh yeah, some Pam (or other nonstick spray) would be a good idea, too!
Start by melting half a stick (4 tablespoons) of butter in a large pot.  I guess that you could use some kind of fake butter if you have to, but why would you want to? 
Then, put the Oreos in a zippy-top bag (yes, I just used "zippy-top"), and zip the top. 

Apparently, some stores (like the Dollar General, where we got these Oreos) carry some products in weird sized packages.  Who knew?  Anyway, if you just get a regular sized package of Oreos from a regular grocery store, you will probably have to use a bigger zippy-top bag. 
 Then, use a rolling pin, and really beat the heck out of the Oreos.  You could also use a food processor, but that wouldn't have been as much fun.
 Once the butter is melted, add the 5 cups of mini marshmallows.
 Stir them all around, and let them melt completely.

I don't have any pictures of the next part, because it had to happen pretty quickly, I only have two hands, and I had a toddler wrapped around my legs, but pour the crushed up Oreos in the pot, and stir it all up.
Then pour it all in a well greased pan.  I used a round pan because 1. it was the first pan I grabbed, 2. it doesn't take up too much space in my dish washer, and 3. my Oreo mixture was lacking some volume (due to the weird sized package of cookies), and I didn't want my treats to be too thin.  That being said, use whatever kind of pan you want. 

I also want to add that I wish that I had crushed up my Oreos a little bit more.  They still tasted great, but I'm sure that it would have improved the texture.
Slice them up, and enjoy!

Monday, November 14, 2011

Never Eat Flavorless Pinto Beans Again!


beans beans
the magical fruit
the more you eat ‘em
the more you toot
As a child, I was always afraid to eat beans, as I feared their magical powers, and was afraid that they would give me the uncontrollable need to toot in public.  As an adult, I realize that they’re really not all that bad, and in fact, I have grown to love beans.  Any kind of beans.  Red beans. White beans. Black beans. Navy beans (which aren’t actually blue). Garbonzo beans. Pretty much any bean you can name, I love.  However, the Hubster isn’t quite a cultured in the world of beans as I.  Don’t get me wrong, he loves beans, too, but for the Hubster, they must be pintos.  The Bunny eats literally anything that we put in front of him, so these beans are a winner with the whole fam.
I will add that flavorless beans are incredibly disappointing, so I have vowed to myself (and now to you) to always cook flavorful beans!
First, wash your beans in water, and pick through them, making sure that there aren't any rocks or anything else weird.  
Then put the beans in a big pot (or a Crock Pot), and cover with water. You can add more water later, so don't worry too much about an actual amount right now.

Also, I know that a lot of people feel the need to soak their beans before cooking.  If you have the time, great, but there is no "need" to soak them.
Then add a ham bone.  I go to Honey Baked Ham to get my ham bones, because they still have a lot of ham on them.  I mean, there is seriously a lot of ham.  There is enough ham that if we just wanted ham for supper, our little family could just go buy one of these ham bones, and be perfectly fine with it.  Plus, they are cheap.  If you don't want the bone in your beans, just get some kind of salty pork to put in there, but you take the bone out before you eat it, so you really shouldn't worry too much about the bone.  If you're vegetarian, just leave it out, but if you aren't, I wouldn't recommend it. Anyway, if you cook it long enough, the meat will all fall off of the bone, so your beans will just be flecked with ham... yum!
Slice up (or chop up) a large onion.
Throw the onions in the pot.  This is usually the point where I throw in some diced bell pepper, too, but when I went to grab my bell pepper to chop it, it was a slimy and fuzzy and gross.  Yuck!  Apparently it was in our produce pile for too long.

Anyway, you know when you go to Costco, and you see those huge jars of minced garlic, and you wonder who on earth uses that much garlic?  Well, I do!  Throw a bunch of that in the pot, too.
Cover, and let it cook on low for about 6 to 8 hours.  Then, after the beans have cooked, you can add some salt.  Instead of salt, I used Tony Chachere's Creole Seasoning, but if you don't like it (or don't have any), salt and pepper will be just fine.
.
I ate mine with caramelized onion balsamic spread (because I just got it, and wanted something to eat it on) and green onions (because I had some left over from something else) on top, but they are good without either of these things.  The next time I had a bowl, I made cornbread to go with it, which was also great.  Either way, they are delicious, inexpensive, and easy to make.


Pinto Beans:
1 lb dried pinto beans
water to cover
1 ham bone
1 large onion, sliced
1 bell pepper, diced
4 tbsp minced garlic
salt and pepper (or Creole seasoning) to taste
Put beans in a colander and rinse under running water.  Remove any rocks, deformed beans, etc. Put beans in a pot, and cover with water.  Add ham bone, onion, bell pepper, and garlic to pot.  Cover, and cook for 6-8 hours, checking occasionally, and adding more water if needed. Once beans are finished cooking, salt and pepper (or add Creole seasoning) to taste.